
3D Rendering Walkthrough: A Complete Guide for Architecture, Real Estate, and Construction
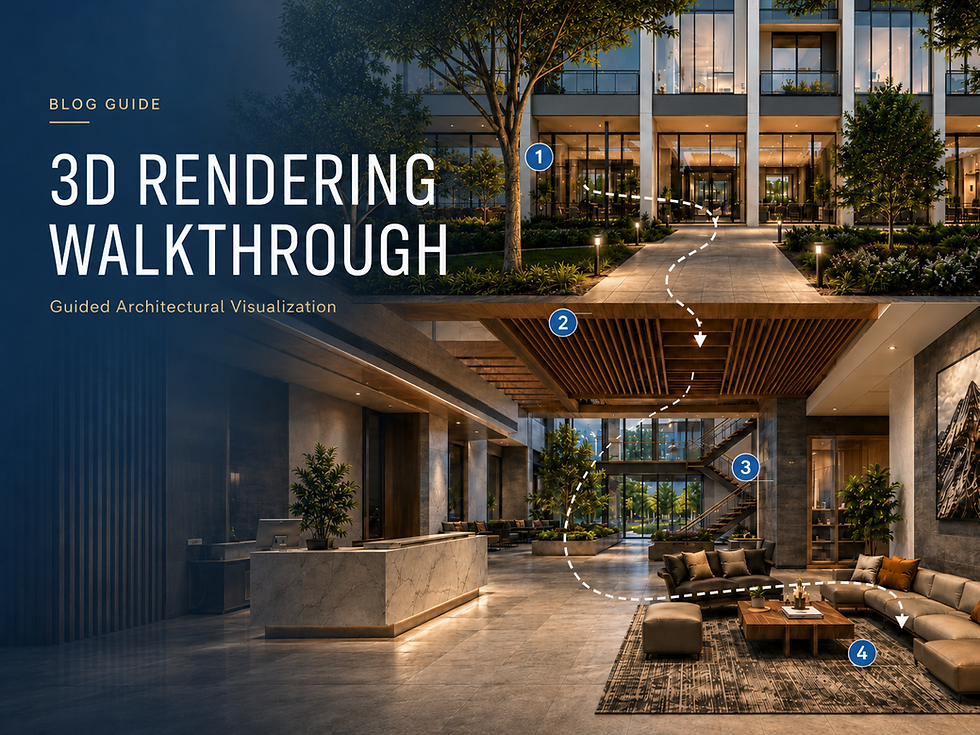
A 3D rendering walkthrough allows viewers to experience an architectural project as a carefully directed journey rather than as a collection of separate images. It can show how someone approaches a building, enters a lobby, moves through principal rooms, understands circulation, and experiences changes in material, scale, lighting, and spatial character.
For architects, developers, contractors, interior designers, real estate teams, and project owners, this form of visualization addresses an important communication problem: drawings explain what a project contains, but they do not always communicate how the project will feel or how its spaces connect.
A well-produced walkthrough combines accurate 3D modeling, architectural understanding, realistic materials, lighting, camera movement, animation, editing, and visual storytelling. The result can support design reviews, stakeholder presentations, investor discussions, entitlement communication, real estate marketing, construction planning, and executive decision-making.
As part of its broader architectural visualization, CGI, and animation services, RENDEREXPO develops visual content around the specific decisions, audiences, and communication objectives of each project—not simply around creating an attractive video.

What Is a 3D Rendering Walkthrough?
A 3D rendering walkthrough is an animated representation of an architectural or interior environment created from a digital 3D model. A virtual camera moves through the modeled project along a predetermined route, allowing the viewer to experience the design sequentially.
The walkthrough may begin outside the site, approach the building, pass through the entrance, and continue into important interior spaces. For a larger development, it may also include elevated views, site circulation, landscaped areas, amenities, public spaces, and connections between multiple buildings.
Unlike a static rendering, which presents one carefully selected viewpoint, a walkthrough communicates:
Movement between spaces
Circulation and wayfinding
Changes in scale and enclosure
Connections between indoor and outdoor areas
Material transitions
Daylight and artificial lighting
Views from one space into another
The relationship between architectural moments
The sequence in which a visitor experiences the project
A professional walkthrough is therefore not merely a moving rendering. It is a structured visual narrative built around spatial experience.
3D Rendering Walkthrough vs. Other Visualization Formats
The term “3D walkthrough” is sometimes used interchangeably with animation, flythrough, virtual tour, and virtual reality. These formats are related, but they are not identical.
Static Architectural Rendering
A static rendering is a single high-resolution image developed from a fixed camera position. It is particularly effective for advertising, competition boards, design presentations, brochures, websites, signage, and approval packages.
RENDEREXPO’s exterior rendering services can communicate façade design, materials, landscaping, streetscape context, and the relationship between a proposed building and its surroundings. Interior imagery can similarly focus attention on furniture, lighting, finishes, and architectural details.
Static renderings provide greater resolution for individual views, while a walkthrough explains how those views connect.
Architectural Walkthrough
An architectural walkthrough generally follows a path similar to the experience of a pedestrian moving through a project. The camera is usually positioned near eye level and moves through entrances, corridors, rooms, amenity areas, and outdoor spaces.
This format is effective when circulation, interior sequencing, or user experience is central to the presentation.
Architectural Flythrough
A flythrough typically uses more expansive camera movement. The camera may travel above a site, orbit a building, pass between structures, or move across an entire development.
Flythroughs are particularly useful for master plans, multifamily communities, industrial campuses, institutional projects, infrastructure developments, and data center sites. They can be combined with aerial rendering and campus visualization to communicate development scale and site organization.
Interactive Virtual Tour
An interactive virtual tour allows the user to choose where to look or where to move. Instead of watching a fixed sequence, the viewer may navigate between predetermined positions or explore a real-time 3D environment.
This can be useful for property marketing, client presentations, design-option comparisons, or remote project reviews.
Virtual Reality Experience
Virtual reality places the user inside an immersive digital environment through a headset or compatible display. It can provide a stronger sense of scale and presence than a conventional animation, but it also requires a different production workflow and presentation strategy.
Walkthrough animation remains more universally accessible because it can be viewed through websites, presentations, mobile devices, social media, and conventional screens without specialized equipment.
Captured Tour of an Existing Property
A scanned or photographed virtual tour documents an existing space. A 3D rendering walkthrough typically represents a space that is proposed, under design, being renovated, or not yet constructed.
The distinction is important: one documents present conditions, while the other visualizes a future condition.
Why a 3D Rendering Walkthrough Matters
Architectural projects are often reviewed by people with very different levels of technical knowledge. Architects, engineers, and contractors may understand plans, elevations, sections, BIM models, and schedules. Investors, prospective tenants, public officials, community members, and senior executives may need a more immediate form of communication.
A 3D rendering walkthrough translates complex project information into a visual experience that can be understood without requiring the viewer to mentally assemble separate drawings.
It Clarifies Spatial Relationships
A plan may show that a lobby connects to a lounge, corridor, and courtyard. A walkthrough shows how those connections are actually experienced.
It can reveal:
Whether an entrance feels prominent or difficult to identify
How quickly a visitor understands the circulation system
Whether a corridor feels narrow or appropriately scaled
How one room frames a view into another
Whether major destinations are visually connected
How ceiling height, daylight, and materiality affect the character of a space
These observations can improve design discussions before construction begins.
It Supports More Informed Design Reviews
A walkthrough gives project teams another way to evaluate design decisions. When the camera moves continuously through the model, transitions and inconsistencies can become easier to notice.
The team may identify:
Abrupt material changes
Unresolved ceiling conditions
Poorly aligned architectural elements
Confusing circulation
Obstructed views
Inconsistent lighting
Furniture that restricts movement
Landscape elements that interfere with entrances
Exterior elements that look appropriate in elevation but awkward in perspective
A walkthrough does not replace technical coordination, but it can provide a valuable communication layer alongside drawings and BIM information. For construction-focused applications, it may also be coordinated with digital construction and digital twin services.
It Creates a Stronger Stakeholder Presentation
Project presentations frequently need to explain more than architectural appearance. They may need to communicate arrival, access, security, phasing, visitor experience, landscape screening, public circulation, or operational logic.
A directed walkthrough allows the presentation team to control the sequence in which information is introduced. Instead of asking the audience to interpret multiple disconnected exhibits, the project can be explained as one coherent experience.
It Strengthens Real Estate Marketing
For projects that are not yet built, traditional photography is unavailable. A 3D rendering walkthrough can become a central marketing asset for:
Property websites
Leasing presentations
Sales galleries
Investor meetings
Digital advertisements
Social media campaigns
Trade shows
Email campaigns
Broker presentations
Predevelopment announcements
The animation can also be edited into shorter clips for different platforms, extending the value of the original production.
Static images, animations, and 3D floor plans can be developed from a coordinated visual package so that the project maintains a consistent identity across brochures, websites, presentations, and digital campaigns.
It Helps Investors and Executives Understand the Proposal
Senior decision-makers may have limited time to review extensive drawing sets. A focused walkthrough can communicate the overall project concept, major program areas, development quality, user experience, and architectural character within a concise presentation.
For investor use, the animation should not become overly cinematic at the expense of accuracy. The strongest result balances atmosphere with clear information about the project itself.
Where 3D Rendering Walkthroughs Are Most Valuable
Walkthrough animation can support almost any building type, but the narrative and camera strategy should change according to the project.
Residential and Multifamily Development
For residential projects, the walkthrough may follow the experience of a future resident:
Approaching the property
Entering the lobby
Moving through common areas
Visiting an apartment or residence
Exploring amenities
Reaching a balcony, terrace, courtyard, or rooftop
A multifamily walkthrough may also explain unit layouts, shared facilities, landscape areas, parking access, and the relationship between buildings.
Commercial and Workplace Interiors
For office projects, walkthroughs can communicate reception areas, workplace neighborhoods, conference rooms, collaboration spaces, circulation, branding, lighting, and employee amenities.
They are particularly useful when decision-makers need to understand how an interior concept functions beyond its finish palette. Readers considering interior-focused visualization can explore RENDEREXPO’s guide to 3D rendering for interior design.
Hospitality and Retail Projects
Hotels, restaurants, clubs, and retail environments depend heavily on sequence and atmosphere. The viewer’s experience may begin at the street, continue through the entrance and reception area, and progress toward dining, guest, retail, or amenity spaces.
Camera pacing is especially important for these projects. The animation must provide enough time to understand the environment without making the journey feel slow or artificial.
Industrial and Data Center Projects
A walkthrough for an industrial facility or data center may have a more technical purpose. It could explain:
Secure arrival and access
Campus organization
Service circulation
Equipment yards
Interior technical environments
Expansion zones
Utility relationships
Construction stages
Commissioning sequences
Operational readiness
RENDEREXPO’s data center development support and visualization focuses on translating complex campus, infrastructure, phasing, utility, commissioning, and stakeholder information into understandable visual material.
Construction and Phasing Communication
Walkthrough animation can also show how a project is built rather than only how it will look when completed.
A construction-focused sequence may illustrate:
Site preparation
Temporary access
Delivery routes
Structural assembly
Envelope installation
Interior buildout
Equipment placement
Renovation sequencing
Active and restricted work zones
Future expansion
These applications are closely related to construction visualization, sequencing, BIM communication, and progress visualization.
Campuses and Complex Facilities
Large campuses can be difficult to explain through one image. A walkthrough or combined walkthrough-flythrough can establish the relationship among roads, parking, buildings, entrances, interior circulation, and key destinations.
Where navigation and operational spatial data are important, animation may be coordinated with indoor GIS, outdoor GIS, and spatial mapping systems.
What Makes a Professional 3D Rendering Walkthrough?
The quality of an architectural walkthrough depends on much more than rendering resolution.
A Clear Communication Objective
Before production begins, the project team should define what the animation needs to accomplish.
Is the purpose to:
Approve a design?
Market a property?
Explain circulation?
Attract investment?
Present a project publicly?
Demonstrate construction phasing?
Introduce a new workplace?
Support leasing or sales?
Explain infrastructure relationships?
Without a defined objective, the animation may contain polished scenes but lack a coherent message.
Intentional Camera Planning
The camera path determines what the audience sees, in what order, and for how long.
Professional camera planning considers:
Human eye-level experience
Natural movement speed
Turning radius
Focal length
Composition
Visual hierarchy
Important architectural reveals
Transitions between scenes
The duration of each view
Potential motion discomfort
The camera should move with purpose. Constant movement, exaggerated turns, or unnecessary flights through walls and ceilings can make the presentation feel artificial.
Accurate Architectural Modeling
A convincing walkthrough requires a reliable base model. Walls, openings, ceilings, stairs, millwork, furniture, façade elements, landscape features, and site conditions must be developed to the level required by the camera.
The farther the camera travels and the closer it approaches individual elements, the more extensive the modeling requirement becomes.
The visualization team may work from:
BIM models
CAD drawings
IFC files
SketchUp or other 3D models
Plans, elevations, and sections
Finish schedules
Material references
Furniture selections
Lighting information
Landscape plans
Civil or site plans
Photographs and survey information
For an overview of the relationship between these inputs and final visual production, see RENDEREXPO’s complete guide to 3D modeling and rendering.
Realistic Materials and Lighting
Materials must respond credibly to light and movement. A finish that looks acceptable in one still image may appear flat, repetitive, overly reflective, or incorrectly scaled as the camera moves past it.
Lighting should support both realism and communication. Exterior sequences may require a clear sun direction, appropriate sky conditions, and believable interior illumination. Interior sequences must balance daylight, architectural lighting, decorative fixtures, and exposure changes between spaces.
Appropriate Entourage
People, vehicles, vegetation, furniture, equipment, and accessories establish scale and use. However, excessive entourage can distract from the architecture.
Every element should support the story. A workplace walkthrough may require employees and activity, while a construction sequence may need equipment and temporary conditions. A luxury residential animation may benefit from a quieter and more controlled visual environment.
Professional Editing and Post-Production
Editing converts rendered scenes into a finished presentation. This may include:
Scene sequencing
Color correction
Transitions
Titles
Project information
Diagram overlays
Music
Sound design
Voiceover
Branding
Logo placement
Multiple aspect ratios
Short-form cutdowns
The level of post-production should reflect the intended audience. An investor presentation, social media campaign, technical construction sequence, and public hearing exhibit require different editing strategies.
The 3D Rendering Walkthrough Production Process
A disciplined workflow reduces revisions and helps the project team approve critical decisions before expensive final rendering begins.
1. Project Brief and Audience Definition
The visualization team first identifies the project type, target audience, primary message, required duration, preferred style, delivery platform, and schedule.
This is also the stage to determine whether the deliverable should be a walkthrough, flythrough, interactive experience, VR environment, or combination of formats.
2. Drawing and Model Review
Available architectural, interior, landscape, civil, engineering, and branding information is reviewed. Missing information and unresolved design decisions should be identified before detailed production.
3. Storyboard and Camera Path
The walkthrough is divided into scenes. The team determines the starting point, principal views, transitions, duration, and final sequence.
For a real estate project, the storyboard may prioritize lifestyle and amenities. For a technical facility, it may prioritize access, equipment, circulation, and phasing.
4. Model Preparation
The 3D model is cleaned, completed, or rebuilt as needed. Unnecessary geometry may be removed, while camera-facing elements receive additional detail.
Good asset organization and scene optimization are particularly important for animation. RENDEREXPO’s article on 3D rendering workflow optimization discusses the importance of organized models, materials, assets, and review stages.
5. Materials, Lighting, Landscape, and Context
Materials, fixtures, furniture, landscaping, surroundings, and lighting are added according to the approved design direction.
6. Preview Animation
A low-resolution or simplified preview is issued to review:
Camera movement
Sequence
Timing
Framing
Transitions
Major model conditions
Overall narrative
This is one of the most important approval stages. Camera changes should be resolved before final rendering whenever possible.
7. Detailed Scene Development
After the preview is approved, the team completes model details, materials, lighting, entourage, environmental effects, and final scene refinement.
8. Final Rendering
The animation is rendered frame by frame. Production requirements depend on duration, resolution, scene complexity, lighting, effects, and computing resources.
9. Editing and Delivery
The final frames are assembled and edited. Graphics, music, sound, narration, or branding are added if required. Deliverables may include a full-length animation, presentation version, website version, social media clips, still frames, and multiple aspect ratios.
What Affects 3D Rendering Walkthrough Cost?
There is no meaningful universal price for an architectural walkthrough because production requirements vary substantially.
The main cost factors include:
Total animation duration
Number of scenes
Size of the modeled area
Availability and quality of the existing model
Architectural complexity
Interior detail
Landscape and site context
Furniture and equipment requirements
Number of people or animated objects
Daylight or nighttime conditions
Special effects
Resolution and frame rate
Music, voiceover, and graphics
Number of review rounds
Required schedule
Number of final formats
A 30-second interior sequence developed from a coordinated BIM model is fundamentally different from a three-minute campus animation requiring extensive site modeling, landscape, vehicles, technical infrastructure, and multiple phases.
The most reliable proposal begins with a defined storyboard and deliverable list.
How Long Does a 3D Rendering Walkthrough Take?
Production time depends on the same variables that affect cost. The largest sources of schedule uncertainty are often incomplete design information, an unusable base model, unresolved material selections, and late camera changes.
A more efficient process typically includes:
A complete project brief
Organized source files
One designated decision-maker
An approved storyboard
Early camera-path review
Consolidated comments
Locked materials before final rendering
A clear revision allowance
Starting the walkthrough before every design decision is final can still be valuable, particularly for design review. However, the project team should distinguish between a working visualization model and a final marketing animation.
How to Choose a 3D Walkthrough Rendering Company
A walkthrough provider should be evaluated on architectural understanding as well as visual quality.
Look for a team that can:
Interpret plans, elevations, sections, and BIM models
Understand circulation and spatial hierarchy
Develop a clear storyboard
Explain its review process
Control camera movement professionally
Represent materials and lighting accurately
Manage large architectural scenes
Coordinate technical project information
Produce both animation and high-resolution stills
Deliver files appropriate for presentations and digital marketing
Communicate clearly throughout production
Reviewing a company’s rendering and visualization portfolio can help assess image quality, project range, material realism, composition, and architectural sensitivity. Relevant design case studies may also provide insight into how the team approaches project communication rather than only final imagery.
Building a Complete Visualization Package
A 3D rendering walkthrough is often strongest when it is part of a coordinated project communication package.
The same visual model may support:
Exterior hero renderings
Interior renderings
Aerial views
3D floor plans
Short animation clips
Full walkthroughs
VR presentations
Construction phasing
Investor graphics
Entitlement exhibits
Social media content
Website visuals
Digital twin strategy
Indoor and outdoor mapping preparation
Using one coordinated visual foundation can help maintain consistency in materials, landscaping, camera language, branding, and project presentation.
RENDEREXPO’s broader visualization, digital construction, GIS mapping, and AI Studio services are structured to help teams select the formats that best match their project stage and audience.
Frequently Asked Questions About 3D Rendering Walkthroughs
What is a 3D rendering walkthrough?
A 3D rendering walkthrough is an architectural animation in which a digital camera moves through a modeled building, interior, landscape, or development. It shows how spaces connect and how the project may be experienced before construction.
What is the difference between a 3D walkthrough and a virtual tour?
A 3D walkthrough usually follows a fixed, professionally directed camera path. A virtual tour is typically interactive, allowing the viewer to choose where to look or navigate.
What files are needed to create an architectural walkthrough?
Common inputs include architectural plans, elevations, sections, BIM or 3D models, finish schedules, material references, furniture selections, lighting information, landscape plans, site plans, and project branding.
Can a 3D walkthrough be created before construction?
Yes. Most architectural walkthroughs are created before construction to support design review, marketing, approvals, investor presentations, leasing, sales, or stakeholder communication.
Can a walkthrough show both the exterior and interior?
Yes. A single animation can begin with an aerial or exterior approach, move toward the building, enter through a principal entrance, and continue through selected interior spaces.
Can 3D walkthroughs support construction planning?
Yes. Construction walkthroughs and sequencing animations can communicate site access, staging, temporary conditions, installation order, renovation phases, logistics, and future expansion. They should complement—not replace—technical construction documents and coordination processes.
How long should an architectural walkthrough be?
The appropriate duration depends on the project and audience. The animation should be long enough to communicate the essential journey without including repetitive movement. A concise, carefully edited walkthrough is generally more effective than a longer sequence without a clear narrative.
Conclusion: Using a 3D Rendering Walkthrough to Communicate More Than Appearance
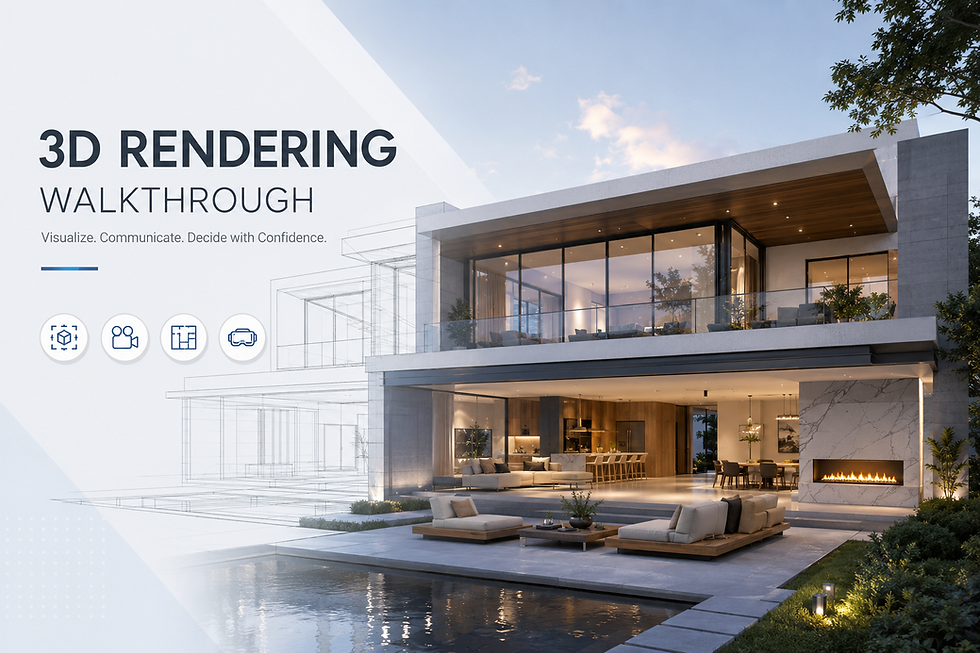
A 3D rendering walkthrough helps an audience understand architecture as a sequence of spaces, decisions, and experiences. It can explain how a visitor arrives, how rooms connect, how materials change, how daylight enters, how a campus is organized, or how construction progresses over time.
Its value is not limited to visual presentation. When developed around a clear objective, a walkthrough can support design evaluation, stakeholder alignment, investor communication, public review, leasing, sales, marketing, construction coordination, and executive decision-making.
RENDEREXPO approaches walkthrough production as part of a broader project communication strategy. The company combines architectural understanding, visualization, animation, digital construction, and high-end visual storytelling to create presentation material suited to serious architecture, real estate, construction, industrial, infrastructure, and data center projects.
Learn more about RENDEREXPO, explore the company’s visualization portfolio, review additional insights on the RENDEREXPO blog, or contact RENDEREXPO to discuss a 3D walkthrough, animation, architectural rendering, or coordinated project visualization package.


Comments